Tracking Shopify Conversions In Google Analytics can be easy, however, Shopify does restrict custom code on certain pages used in the checkout process which makes it difficult to accurately track transactions and revenue. When using implementation tools like Google Tag Manager most tracking is done via a series of tags and triggers, but this won’t work for Shopify as you are unable to add any custom JavaScript to your Shopify checkout page. The best way to configure google analytics with Shopify is by installing the Google Analytics tracking script directly through Shopify to ensure that no data is lost.
This will also cover the process for capturing the same data within Google Analytics 4
1. Login to your shopify store
2. Click on “Online store” from the bottom left of the screen

3. Click on Preferences

4. Find the “Google Analytics” section in the middle of the page
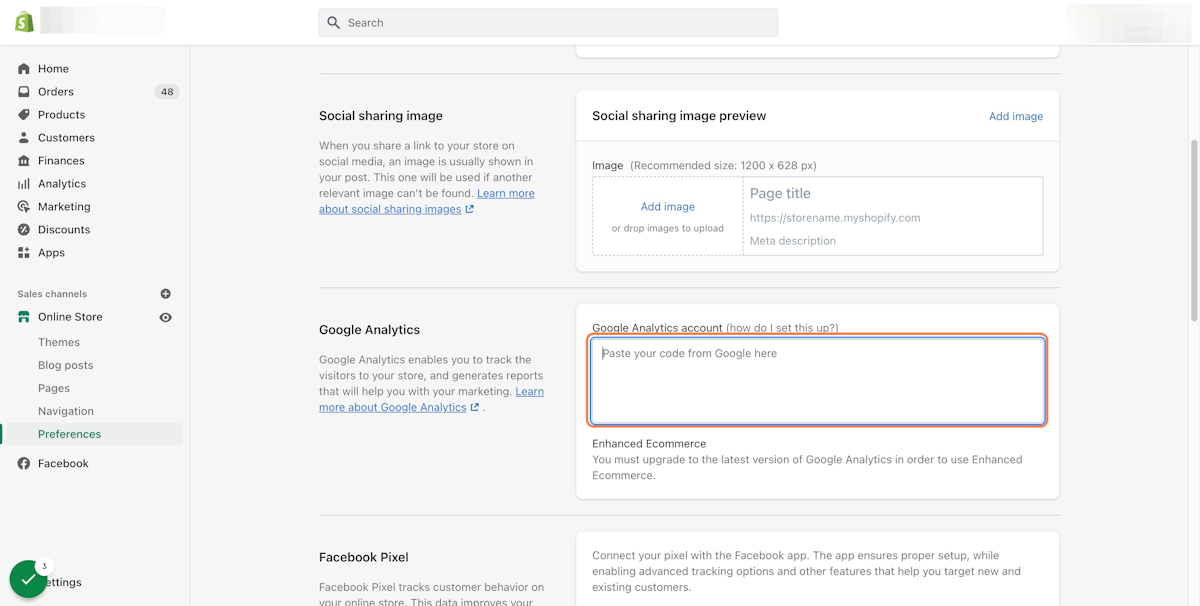
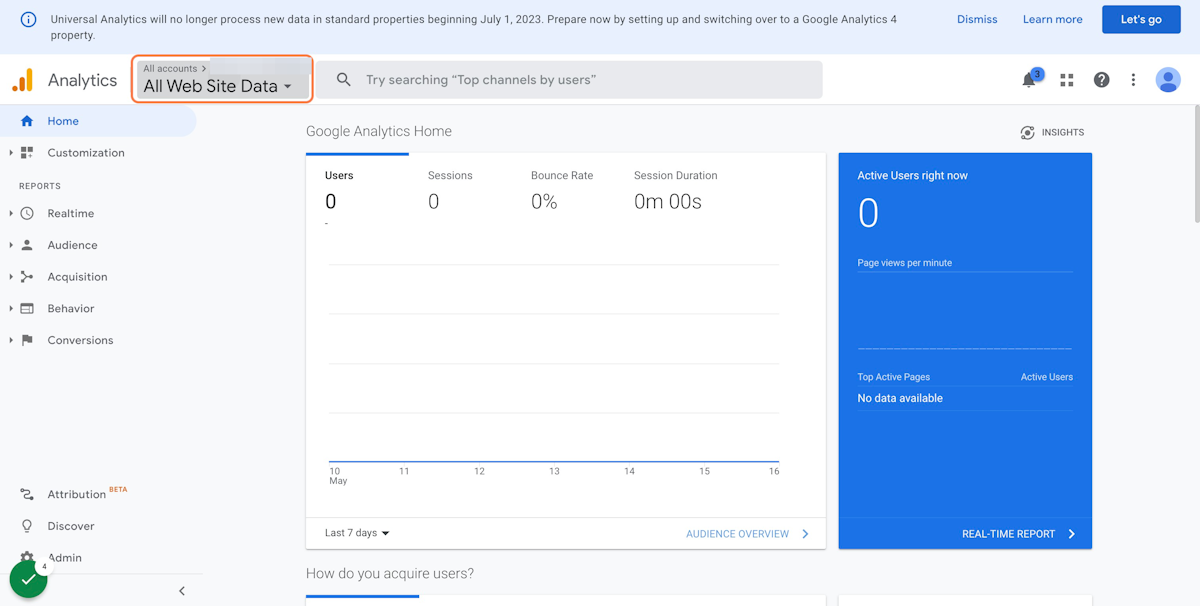
5. To get your google analytics tracking script go to analytics.google.com
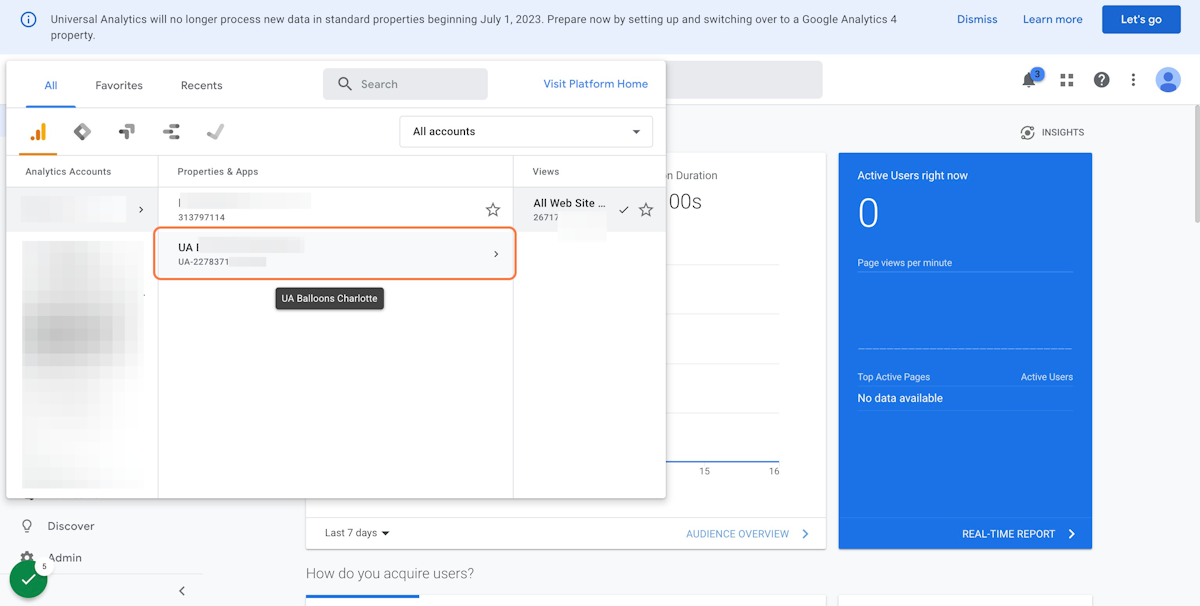
6. Click on your universal analytics property from the middle of the page (the tag that begins with UA-)
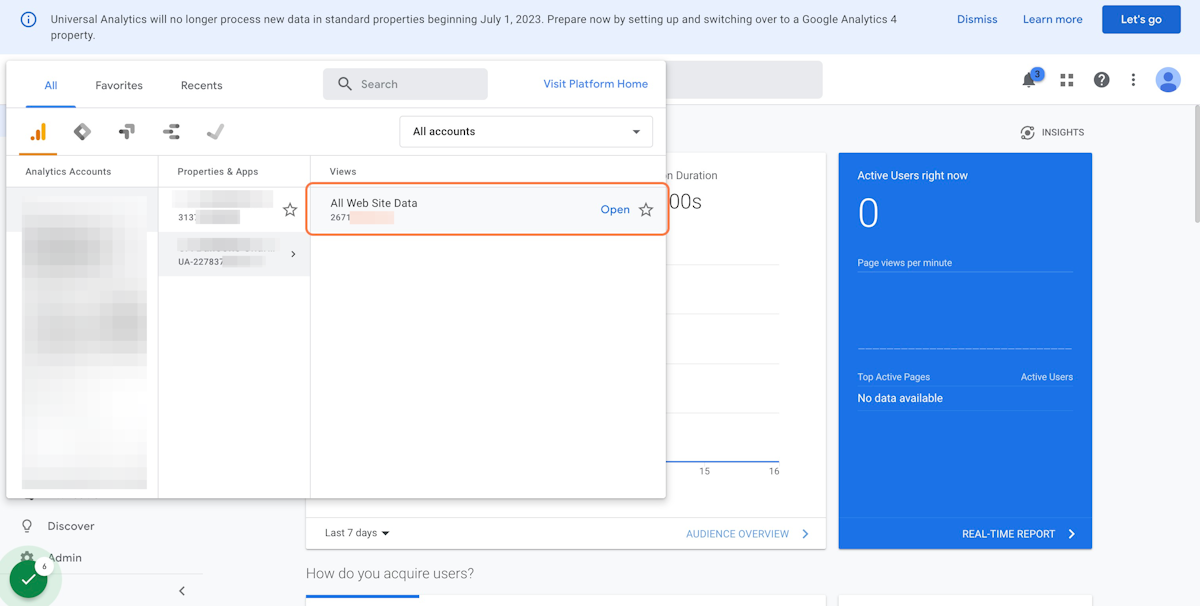
7. Click on the view that you are currently using for tracking in Google Analytics
8. Now that you are in the correct view Click on the Admin button on the bottom left of the screen
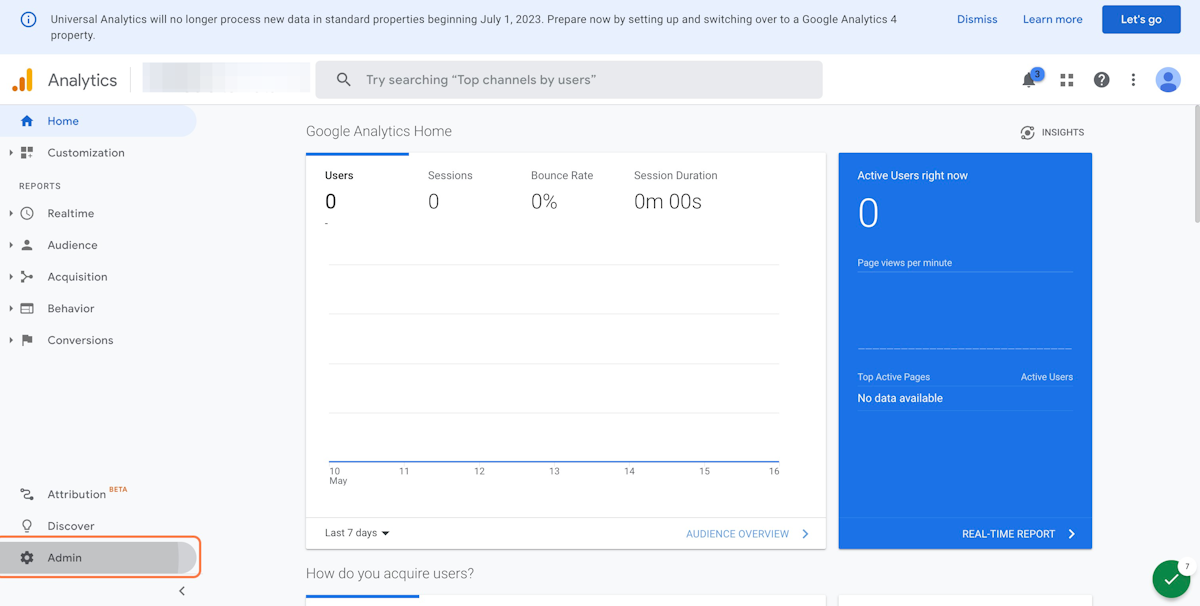
9. Select “tracking info” from the middle column
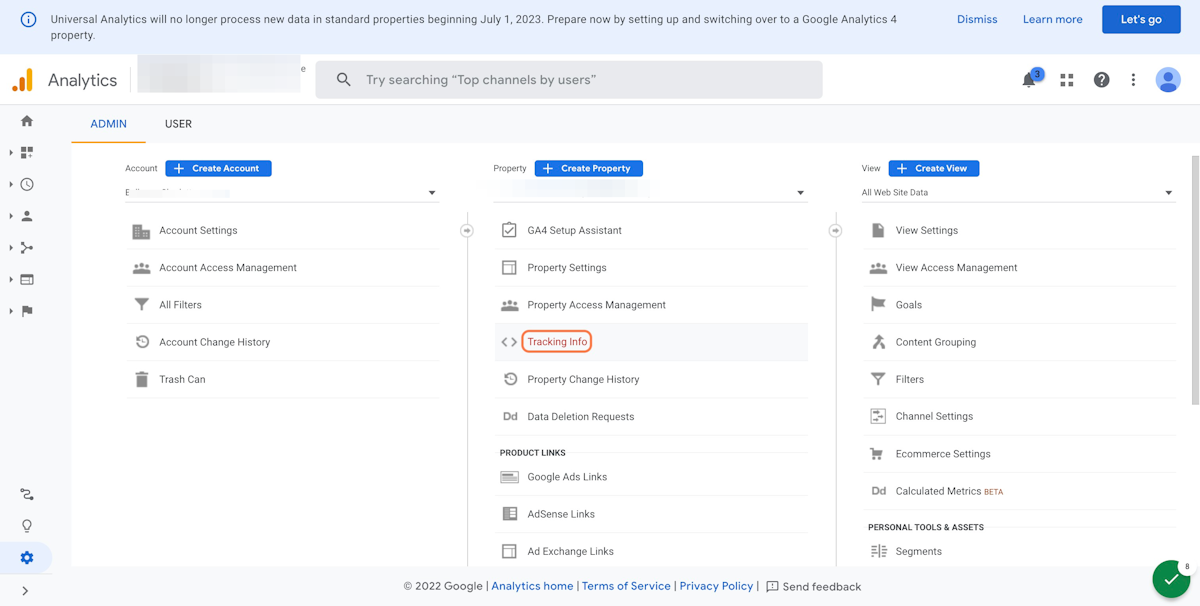
10. Then choose the option for “tracking code”
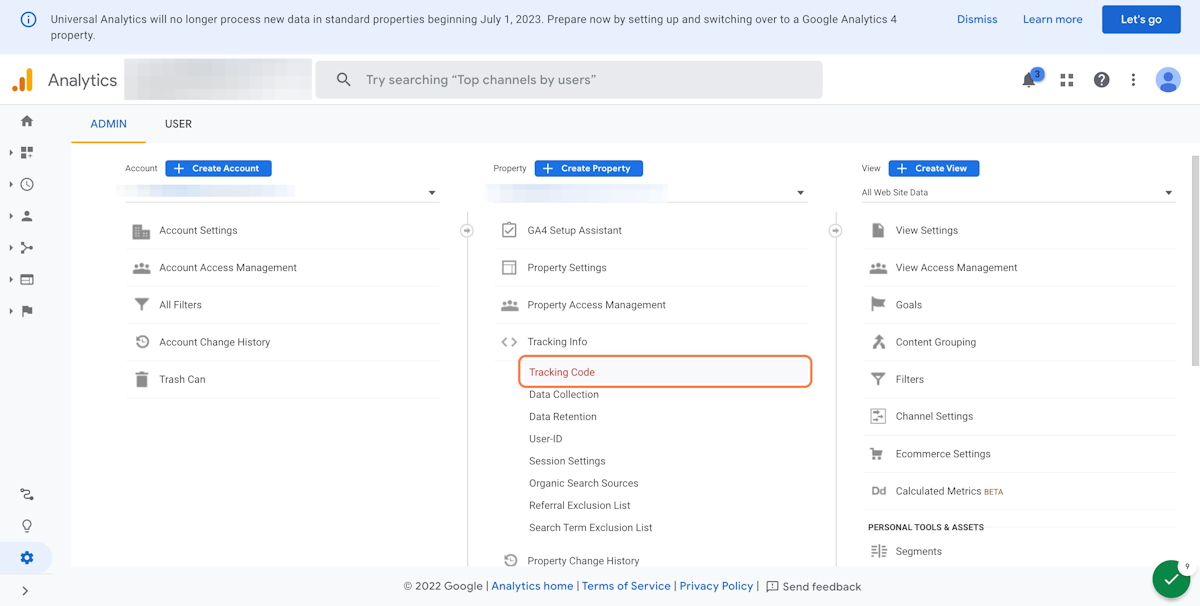
11. Copy the javascript snippet within the “Global site tag”
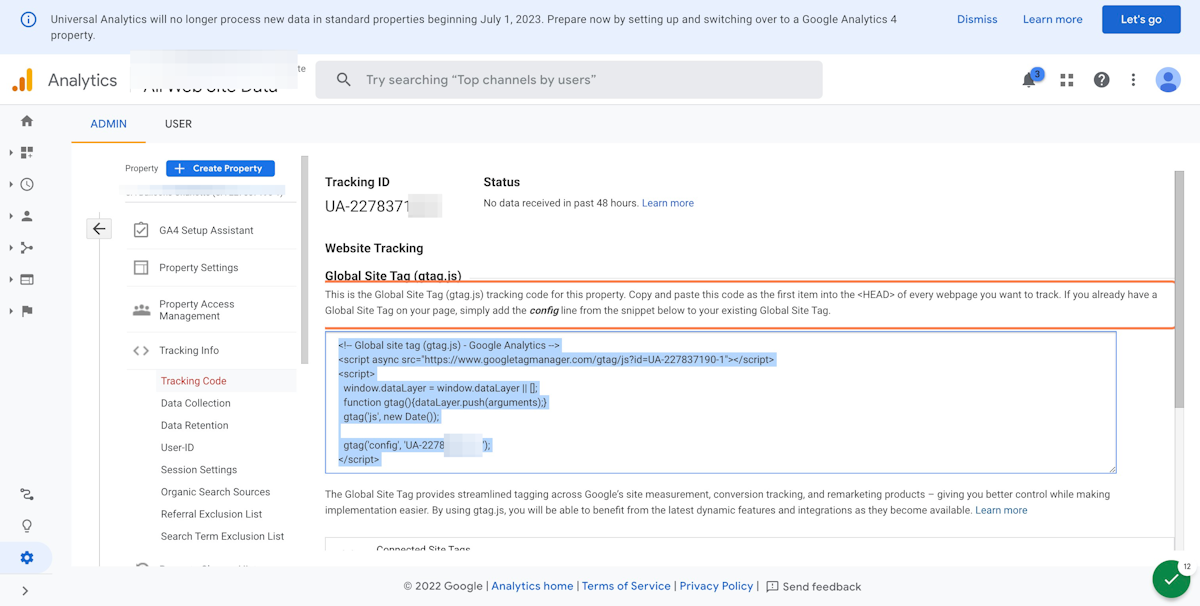
12. Paste the tracking script from google analytics into the section google analytics section of Shopify
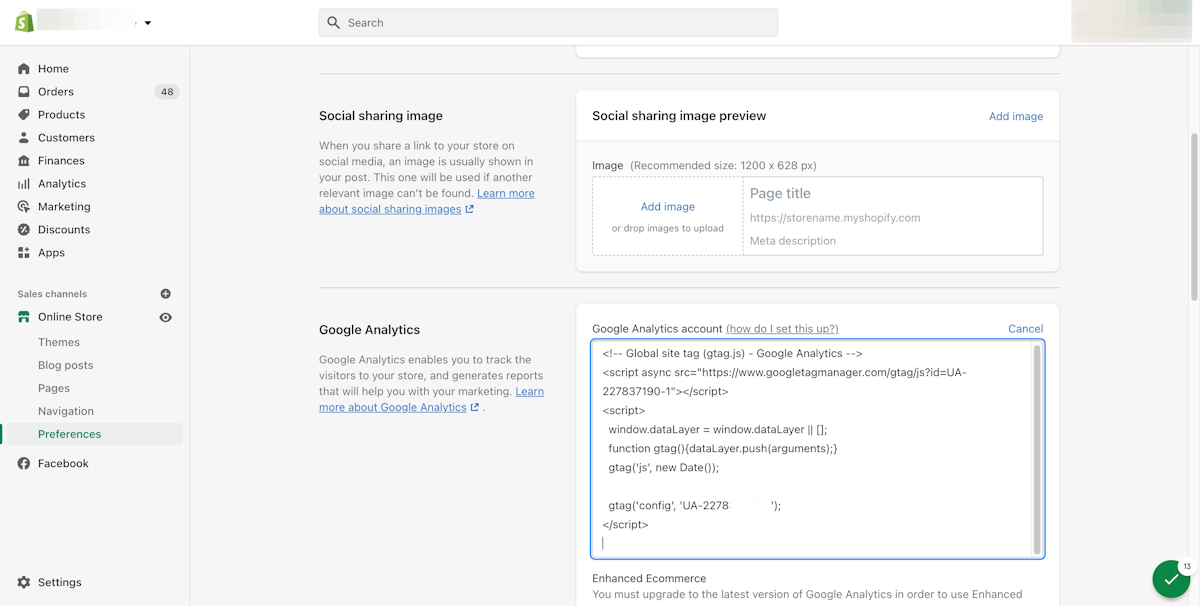
13. Don’t forget to save
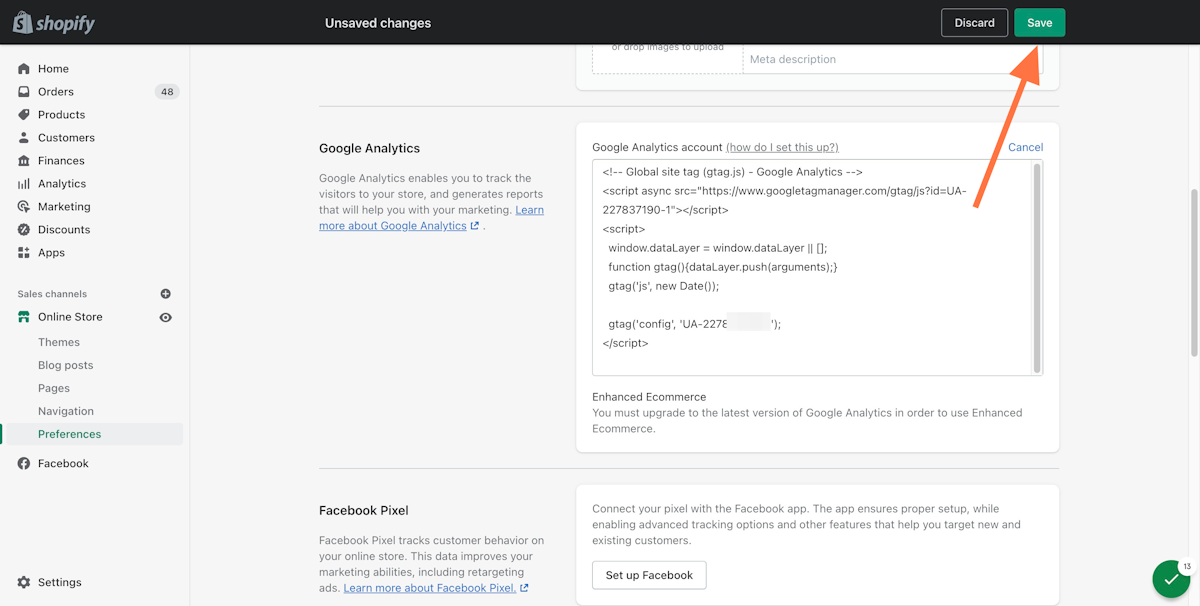
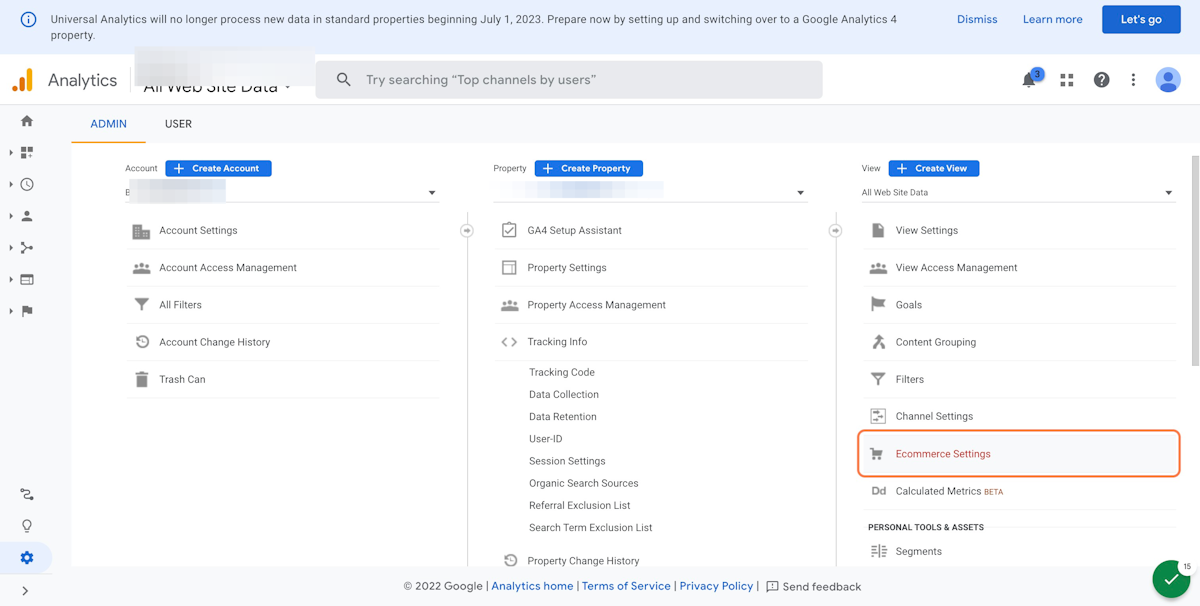
Now that the google analytics tracking code is installed within Shopify, we need to make sure that google analytics is set up to receive e-commerce-specific data. To do this we need to head back to Google Analytics and navigate to the admin section again.
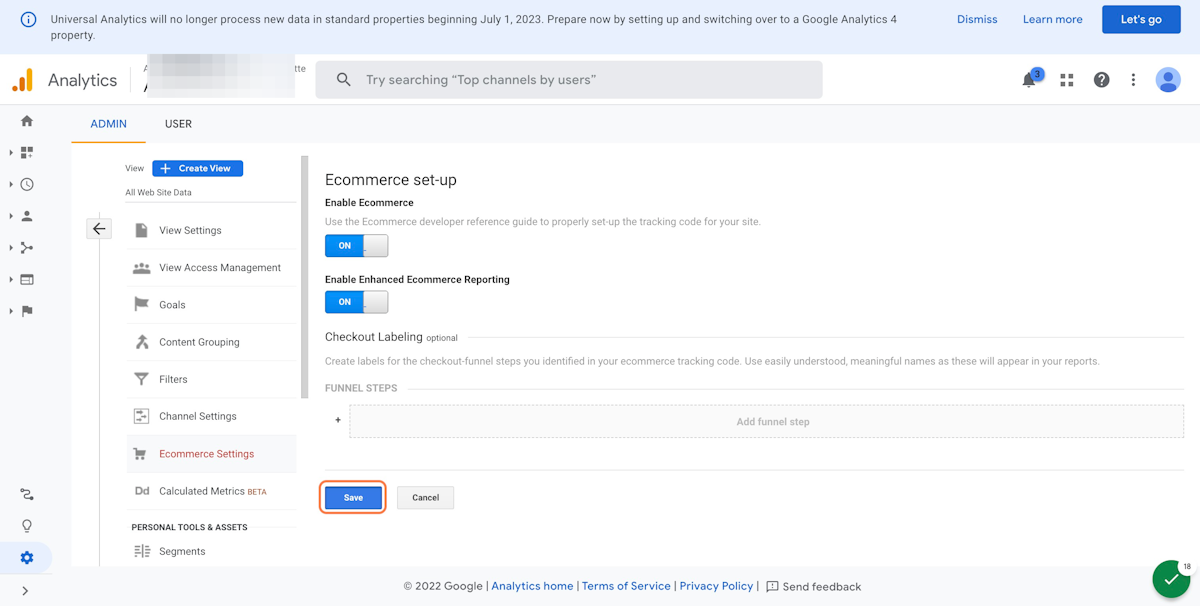
14. From the admin menu select “Ecommerce settings” from the right-hand column
15. Change to option to “On”
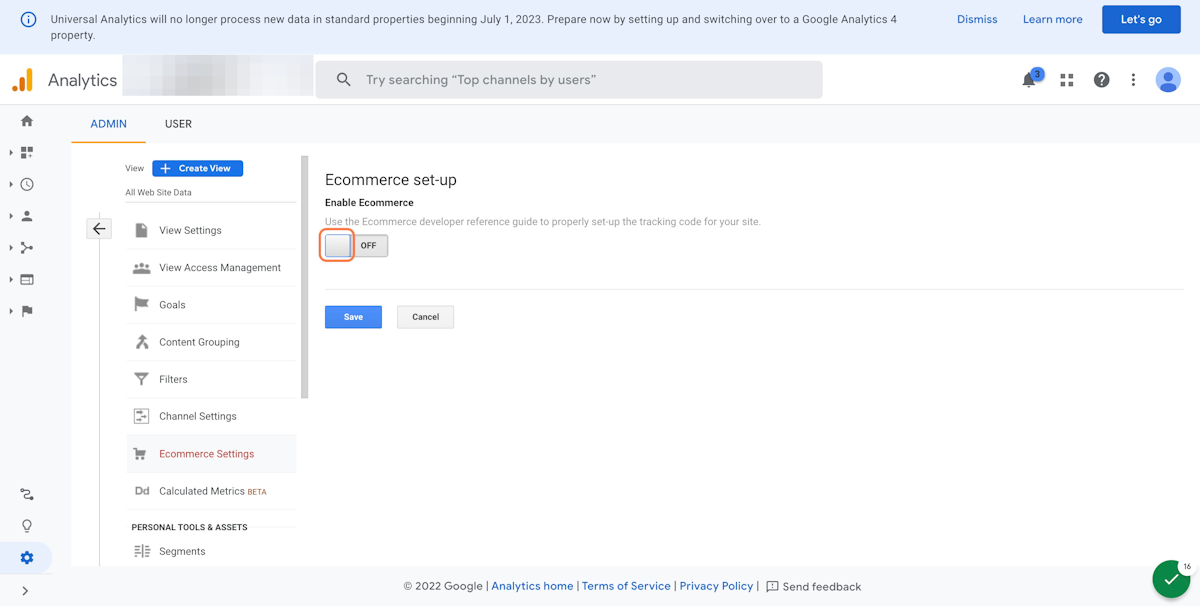
16. Enable enhanced e-commerce if you would like (it’s not necessary but if you take the time to configure this it can be helpful)
Now that our Universal analytics property is setup to track conversion data from our Shopify store we need to connect our Universal Analytics property to our Google Analytics 4 property. To do this:
17. Navigate Back To The GA4 Property
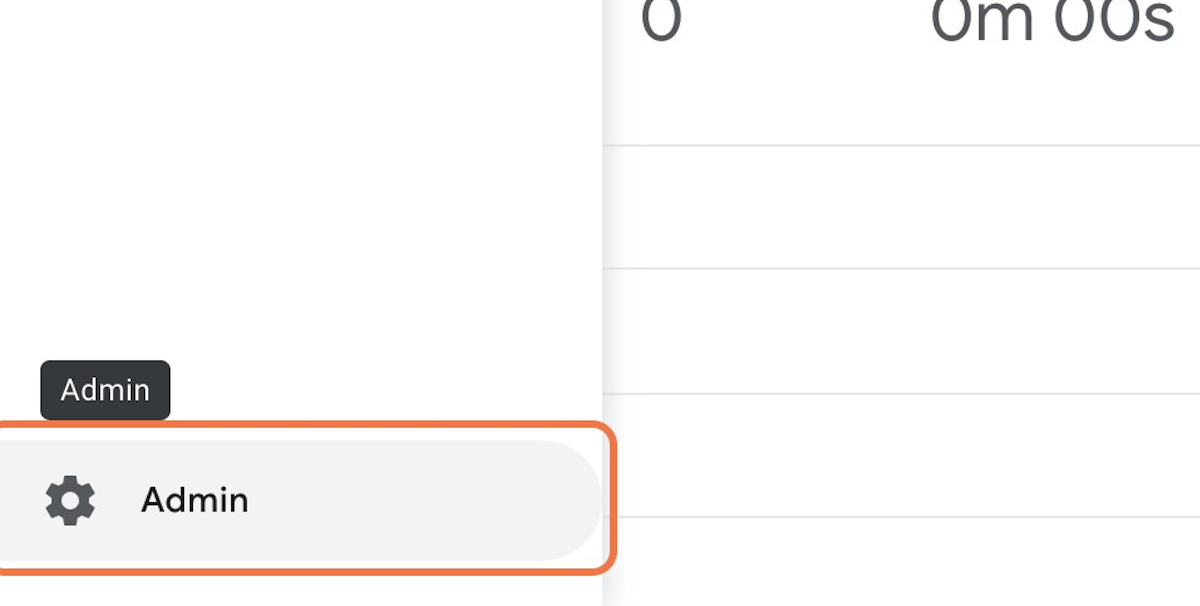
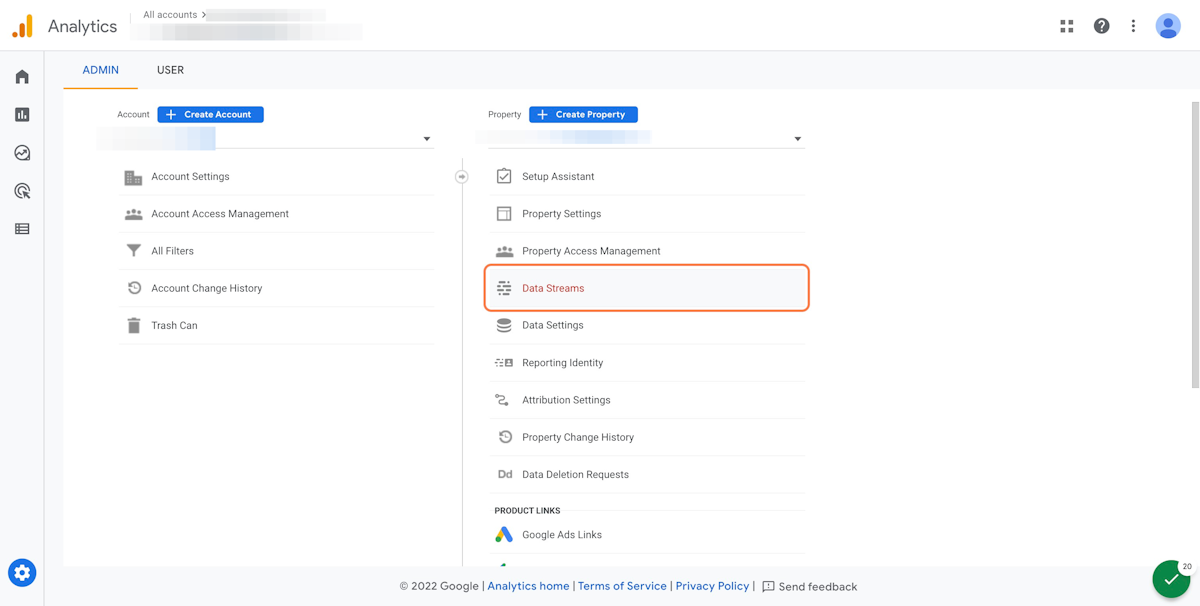
18. Click on Data Streams from the middle column
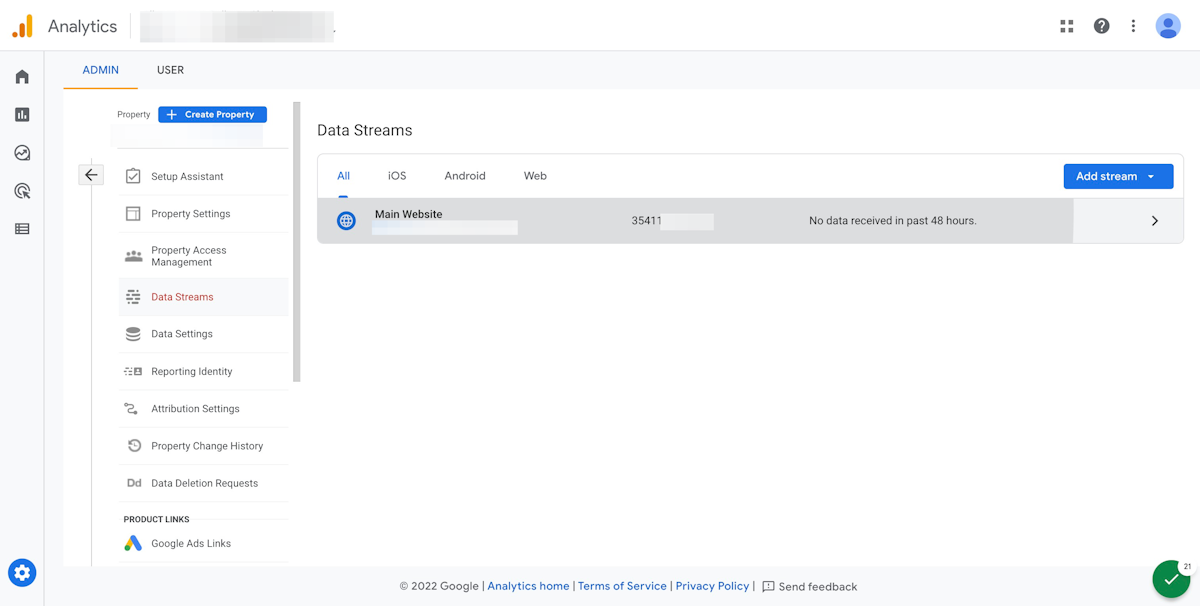
19. Click on the data stream for your website and Copy the Measurement ID
20. Exit the admin screen
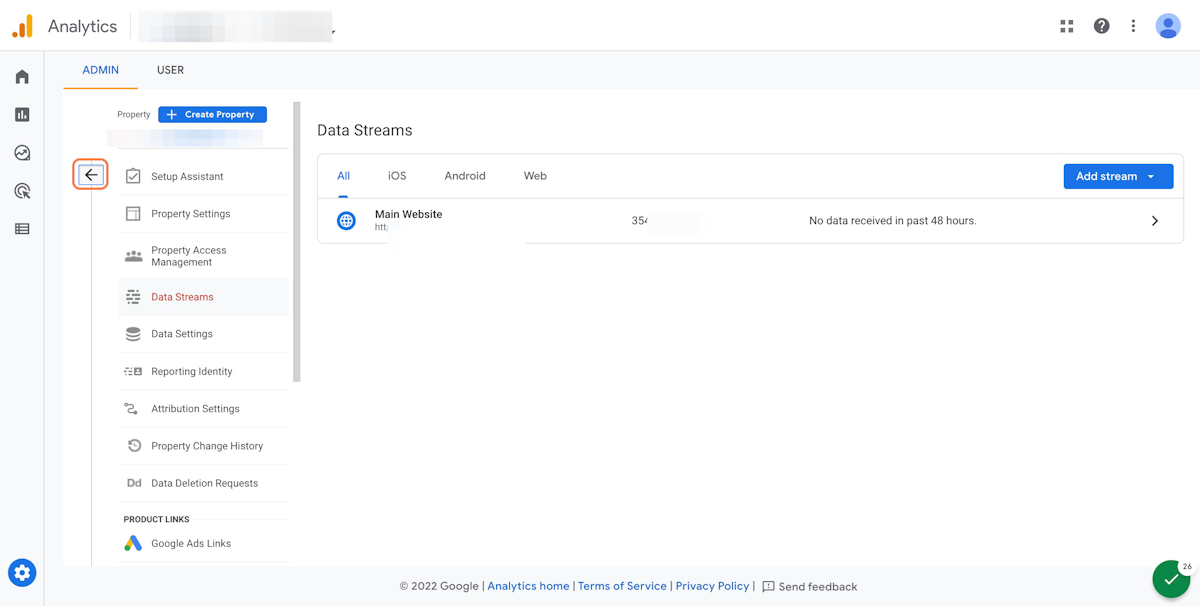
21. Navigate back to the Universal Analytics Property
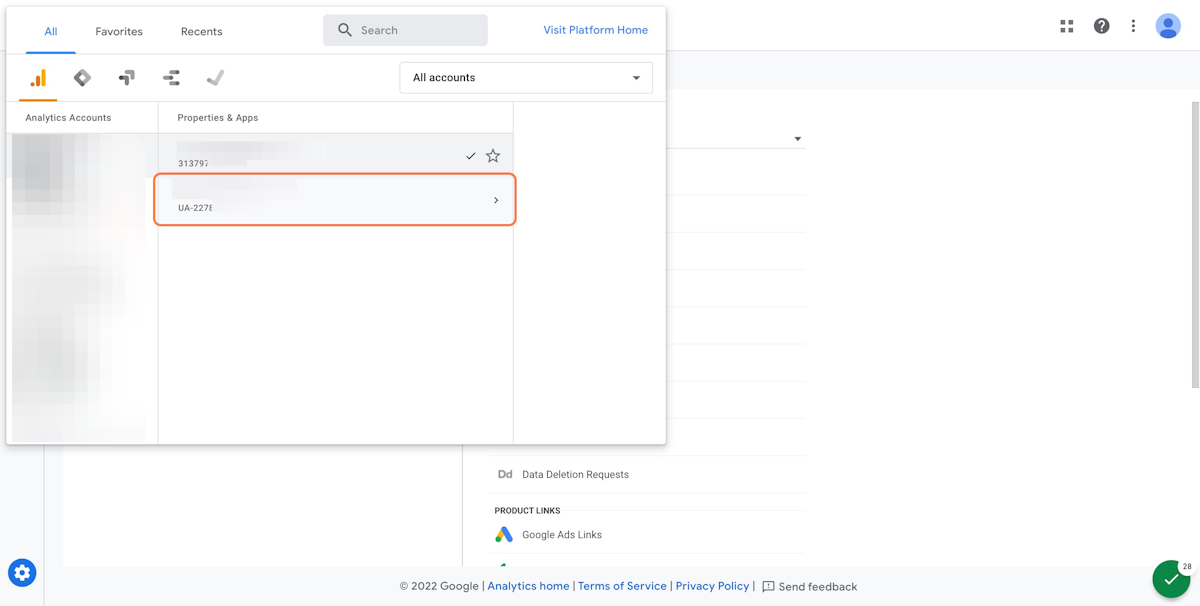
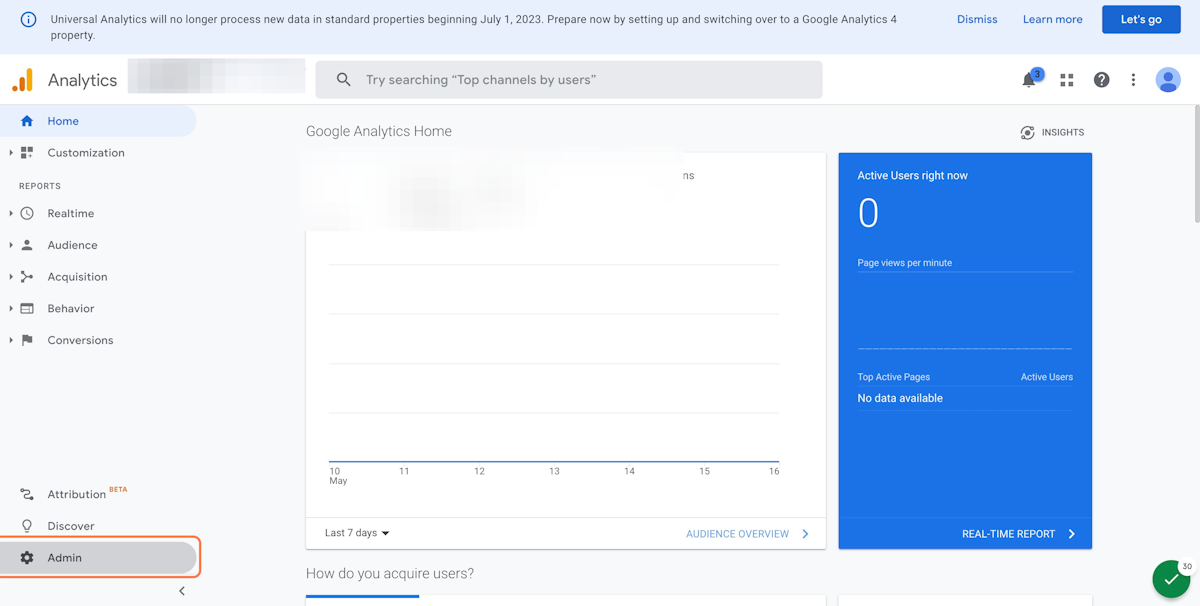
22. Click on Admin
23. Click on Tracking Info
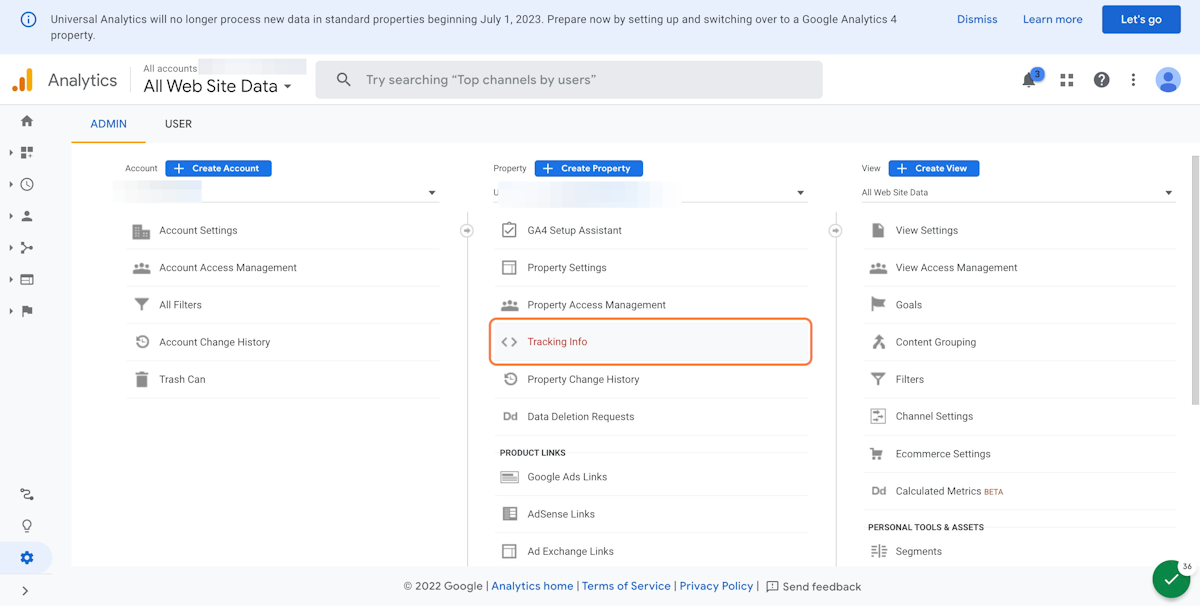
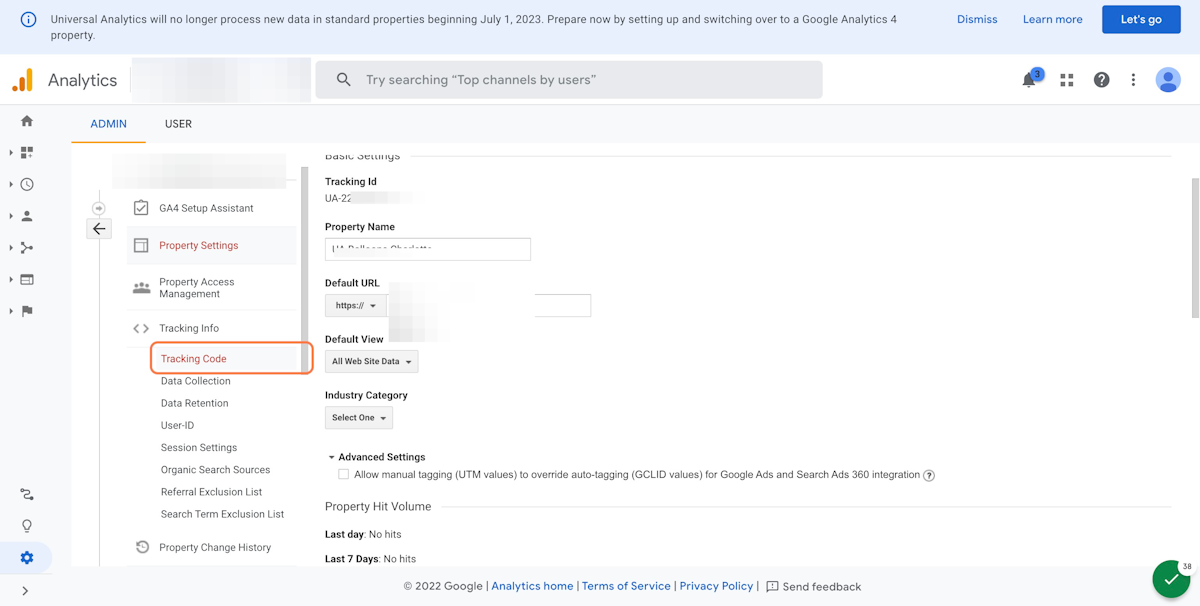
24. Click on Tracking Code
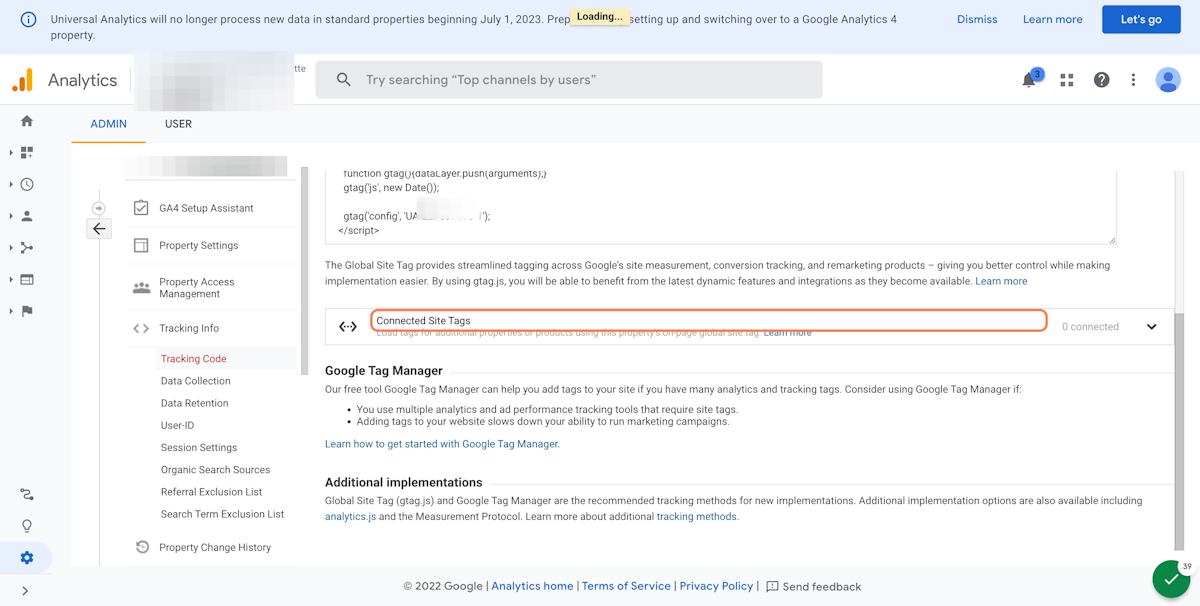
25. Click on Connected Site Tags
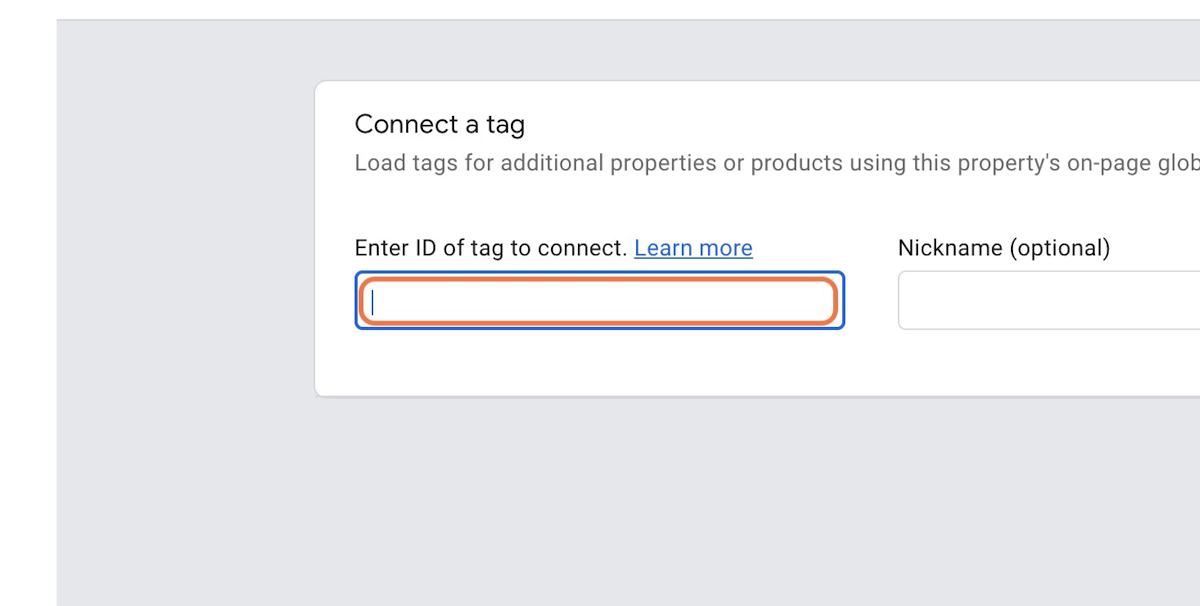
26. Paste your measurement ID for Google Analytics 4
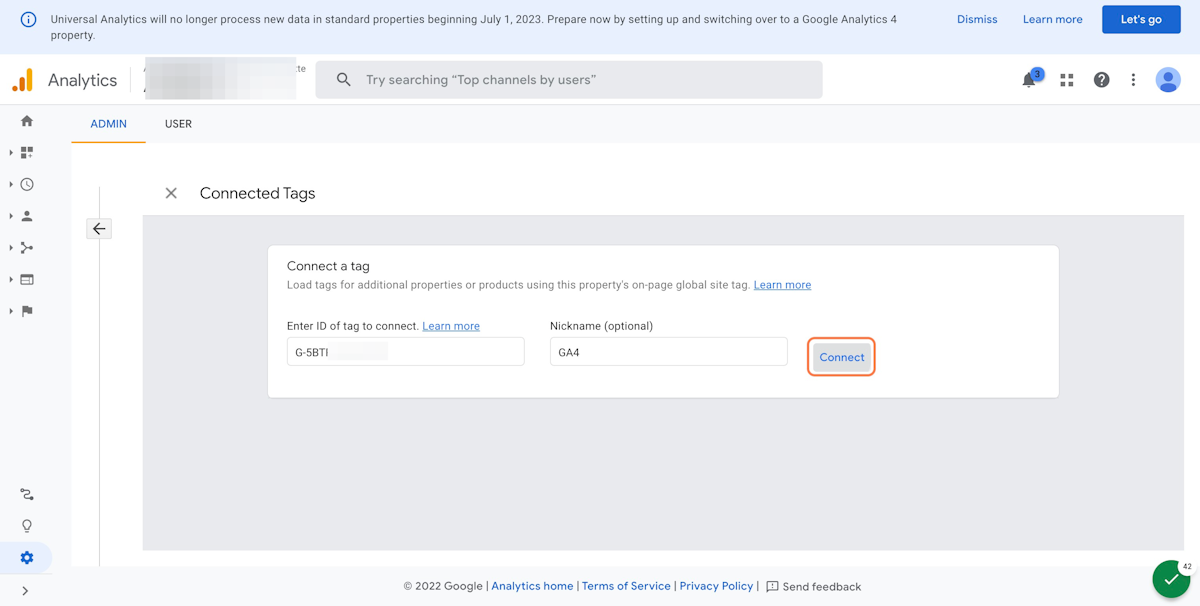
27. Click on Connect
Now you are ready to track transactions and revenue from your Shopify store in Google Analytics 4 and Universal Analytics. Need help setting this up? contact AKWMS to get assistance with setting up your tracking.

